Power Articles
Industry Elevating Content
Tools and Techniques for Cutting Crown Molding on the Flat
PowerArticles
July 10, 2023
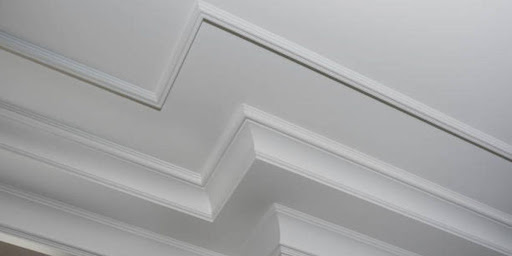
When it comes to adding an elegant touch to interior spaces, crown molding can make a significant difference. However, cutting crown molding on the flat can be a daunting task without the right tools and techniques. This introduction will explore a variety of essential tools and effective techniques that can help DIY enthusiasts and professionals alike achieve precise and seamless cuts, ensuring a flawless installation of crown molding for a polished and refined look in any room.
Essential Tools for Cutting Crown Molding on the Flat
When it comes to cutting crown molding on the flat, there are several essential tools that every DIY enthusiast or professional carpenter should have in their arsenal. These tools are crucial for achieving clean and precise cuts, ensuring a seamless installation of crown molding.
Miter saw
One of the most important tools for cutting crown molding on the flat is a miter saw. A miter saw is specifically designed for making angled cuts, making it perfect for creating the bevels and mitered joints required in crown molding. It features a rotating blade that can be adjusted to different angles, allowing for precise cuts at the desired angles. A compound miter saw, which can be tilted both vertically and horizontally, is particularly useful for cutting crown molding.
Coping saw
Another essential tool is a coping saw. While a miter saw is ideal for outside corners, a coping saw is essential for creating precise inside corners. Coping involves cutting along the profile of the molding to create a snug fit against the adjacent piece. This technique helps to eliminate gaps and ensure a professional-looking finish.
Measuring tools
Accurate measurements are crucial for cutting crown molding on the flat, so having a range of measuring tools is essential. A tape measure is necessary for determining the length of the crown molding pieces, while a protractor or angle finder helps in accurately measuring the angles for miter cuts. A combination square is also useful for marking 45-degree angles and checking for squareness during the installation process.

Step-by-Step Technique for Cutting Crown Molding on the Flat Using a Miter Saw
When it comes to cutting crown molding on the flat, using a miter saw can provide precise and professional results. Here is a step-by-step technique to help you achieve accurate cuts with ease.
A. Measuring and marking:
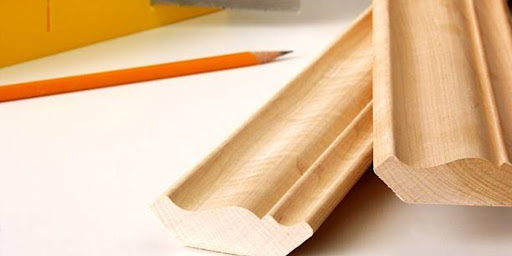
Start by measuring the length of the wall where the crown molding will be installed. Use a tape measure to determine the exact length and transfer this measurement onto the molding. Mark the molding with a pencil to indicate the beginning and end points of the cut.
B. Adjusting the miter and bevel angles
Crown molding is typically installed at an angle, so it’s important to adjust the miter and bevel angles on your miter saw accordingly. Set the miter angle to half the spring angle of the crown molding. The spring angle is the angle between the back of the molding and the wall. Adjust the bevel angle to zero degrees, as the molding will be placed flat against the saw’s fence.
C. Cutting the molding
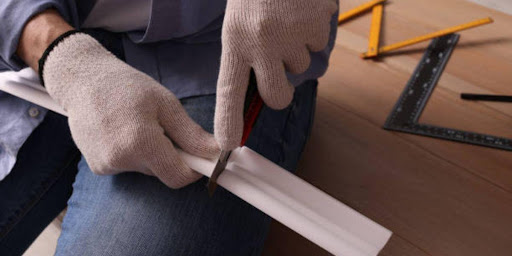
Place the crown molding upside down on the miter saw table, with the bottom edge against the fence and the top edge facing up. Align the marked cut lines with the saw blade. Hold the molding firmly in place and activate the saw. Make a smooth and steady cut, ensuring that the blade stays on the waste side of the line.
Repeat the process for each piece of crown molding needed for your project, making sure to measure and mark accurately and adjust the miter and bevel angles accordingly. Double-check your cuts for accuracy before installing the crown molding.
Tips and Tricks for Achieving Accurate and Clean Cuts
Achieving accurate and clean cuts is crucial when working with crown molding on the flat. This subtopic focuses on providing tips and tricks to help craftsmen achieve precise cuts that result in a polished finish.
- One essential aspect is properly securing the molding. To prevent movement and ensure stability during the cutting process, it is advisable to use clamps or braces to hold the molding securely in place. This helps maintain the desired angle and prevents any unwanted shifting that could result in inaccurate cuts.
- Another tip is to use a sharp blade. A dull blade can lead to splintering, tear-outs, and imprecise cuts. A sharp blade, on the other hand, ensures cleaner and more accurate cuts. It is important to regularly check the blade’s sharpness and replace it when necessary to maintain optimal cutting performance.
- Making test cuts is a valuable practice when aiming for accuracy. By making trial cuts on scrap pieces of molding, craftsmen can assess the angle, depth, and quality of the cut before working on the actual piece. This allows for adjustments to be made, ensuring precise cuts and minimizing mistakes on the final product.
Conclusion
Mastering the tools and techniques for cutting crown molding on the flat is essential for achieving precise and seamless results in carpentry projects. By utilizing a compound miter saw with proper angle adjustments, understanding the importance of accurate measurements, and employing reliable holding devices, carpenters can ensure clean and accurate cuts for crown molding installation. Additionally, practicing the correct hand and body positioning while cutting and employing safety precautions can enhance both efficiency and safety in the process. With these tools and techniques at hand, carpenters can confidently tackle crown molding projects, achieving professional-grade finishes that add elegance and sophistication to any space.
Published By
PowerArticles
July 10, 2023